In this article, I will be outlining the method of multi-textured terrain that I used in my recently completed XNA Real Time Strategy (RTS) project, Toy Factory. I have also expanded this tutorial to cover organic (blended) and deformed terrain. This method enables you to produce a similar result to Riemer’s XNA Tutorial on Multitexturing, but allows for more flexible optimization of your terrain by separating the multi-texturing from the surface geometry.
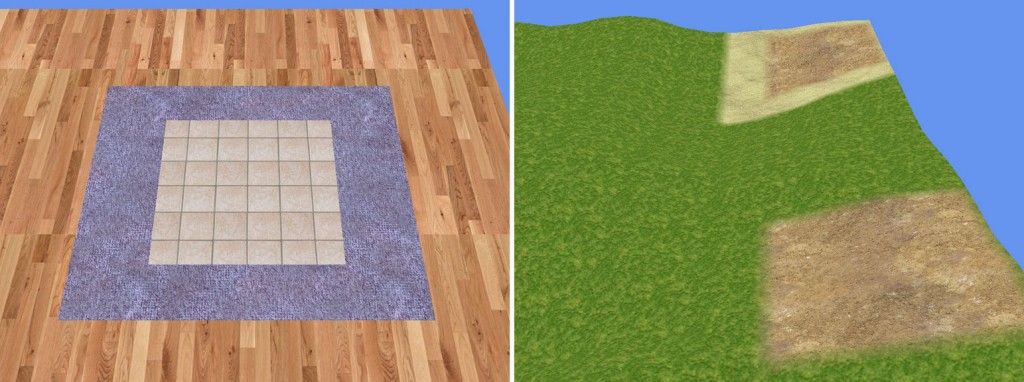
If you are OK with having a flat terrain, this method will achieve extremely high framerates no matter how large your surface is. If you want deformed terrain, this method will still provide a strong starting point that allows for easy optimization of the geometry.
Part 1: Drawing some simple geometry
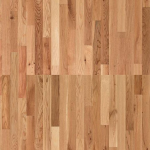
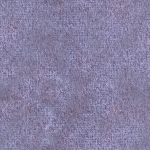
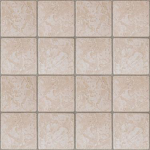
We’ll start with a large, square, two-triangle plane and draw a “ground” texture onto it using our own custom HLSL effect file. This ground texture will describe the type of terrain that we want to draw. In this case, hardwood is red, carpet is blue, and tile is green. This is the ground texture that I am going to use:
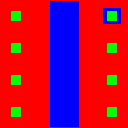
So our current goal is to simply draw that texture onto two very large triangles.
The C# Side
These variables need to be accessible to your initialization and drawing methods:
[code lang=”csharp”]
Effect terrainEffect;
VertexPositionTexture[] vertices;
VertexDeclaration vertexDeclaration;
[/code]
Inside of your initialize method, let’s load the effect (we’ll put the HLSL code in “Content\Effects\Terrain.fx”) and set up the 6 vertices that we will be drawing:
[code lang=”csharp”]
// Load the effect:
terrainEffect = game.Content.Load<Effect>(@”Effects\Terrain”);
// Load the ground texture:
Texture2D ground = game.Content.Load<Texture2D>(@”Ground”);
// Set the texture parameter of our effect to the ground:
terrainEffect.Parameters[“Ground”].SetValue(ground);
// Initialize our verticies:
vertices = new VertexPositionTexture[6];
for (int i = 0; i < vertices.Length; i++)
vertices[i] = new VertexPositionTexture();
// Initialize our vertex declaration:
vertexDeclaration = new VertexDeclaration(device, VertexPositionTexture.VertexElements);
Vector3 topLeft = new Vector3(0f, groundHeight, 0f);
Vector3 topRight = new Vector3(width, groundHeight, 0f);
Vector3 bottomLeft = new Vector3(0f, groundHeight, height);
Vector3 bottomRight = new Vector3(width, groundHeight, height);
Vector2 topLeftTex = new Vector2(0f, 0f);
Vector2 topRightTex = new Vector2(1f, 0f);
Vector2 bottomLeftTex = new Vector2(0f, 1f);
Vector2 bottomRightTex = new Vector2(1f, 1f);
vertices[0].Position = topLeft;
vertices[0].TextureCoordinate = topLeftTex;
vertices[1].Position = bottomRight;
vertices[1].TextureCoordinate = bottomRightTex;
vertices[2].Position = bottomLeft;
vertices[2].TextureCoordinate = bottomLeftTex;
vertices[3].Position = topLeft;
vertices[3].TextureCoordinate = topLeftTex;
vertices[4].Position = topRight;
vertices[4].TextureCoordinate = topRightTex;
vertices[5].Position = bottomRight;
vertices[5].TextureCoordinate = bottomRightTex;
[/code]
The following code will go in your draw method to draw the vertices to the screen using the effect that we will create:
[code lang=”csharp”]
terrainEffect.CurrentTechnique = terrainEffect.Techniques[“Terrain”];
terrainEffect.Parameters[“View”].SetValue(camera.ViewMatrix);
terrainEffect.Parameters[“Projection”].SetValue(camera.ProjectionMatrix);
terrainEffect.Begin();
terrainEffect.CurrentTechnique.Passes[0].Begin();
device.VertexDeclaration = vertexDeclaration;
device.DrawUserPrimitives(PrimitiveType.TriangleList, vertices, 0, numTriangles);
terrainEffect.CurrentTechnique.Passes[0].End();
terrainEffect.End();
[/code]
The HLSL Side
Let’s call this file “Terrain.fx”. We’ve already referenced to the parameters and technique in this effect file in the above C# code. Note lines 12-14 where I ensure that no smoothing from the sampled texture happens by setting the min, mag, and mip filters to “None”. If you want to smooth between terrain types, you could try setting those values to “Linear” instead (but this will require modification of some code that we will look at latter in this tutorial).
[code lang=”c”]
// HLSL to simply sample from a texture
// Input parameters.
float4x4 View;
float4x4 Projection;
texture Ground;
sampler GroundSampler = sampler_state
{
Texture = (Ground);
MinFilter = None;
MagFilter = None;
MipFilter = None;
AddressU = clamp;
AddressV = clamp;
};
// Vertex shader input structure.
struct VS_INPUT
{
float4 Position : POSITION0;
float2 TexCoord : TEXCOORD0;
};
// Vertex shader output structure.
struct VS_OUTPUT
{
float4 Position : POSITION0;
float2 TexCoord : TEXCOORD0;
};
// Vertex shader program.
VS_OUTPUT VertexShader(VS_INPUT input)
{
VS_OUTPUT output;
//generate the view-projection matrix
float4x4 vp = mul(View, Projection);
output.Position = mul(input.Position, vp);
output.TexCoord = input.TexCoord;
return output;
}
float4 PixelShader(VS_OUTPUT input) : COLOR
{
float4 colour = tex2D(GroundSampler, input.TexCoord);
return colour;
}
technique Terrain
{
pass Main
{
VertexShader = compile vs_2_0 VertexShader();
PixelShader = compile ps_2_0 PixelShader();
}
}
[/code]
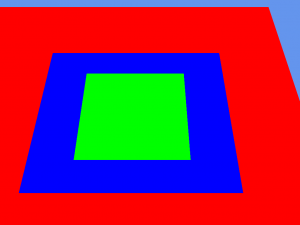
This should result in the following, which is already recognizable as a ground plane that follows the pattern we described in our “ground” texture (zoomed in on the top right corner of the texture):
Part 2: Using the graphics card to decide which texture to draw
Now, time for some magic! Let’s pass in three more textures to our effect:
We can include these new textures the same way we did with the ground texture, but we’ll use them slightly differently:
The C# Side
In your initialize method, add lines 6-12 to load the textures:
[code lang=”csharp” highlight=”6,7,8,9,10,11,12,13,14,15,16,17″]
// Load the ground texture:
Texture2D ground = game.Content.Load<Texture2D>(@”Ground”);
// Set the texture parameter of our effect to the ground:
terrainEffect.Parameters[“Ground”].SetValue(ground);
// Load the terrain textures:
Texture2D hardwood = game.Content.Load<Texture2D>(@”Hardwood”);
terrainEffect.Parameters[“GroundText0″].SetValue(hardwood);
Texture2D tile = game.Content.Load<Texture2D>(@”Tile”);
terrainEffect.Parameters[“GroundText1″].SetValue(tile);
Texture2D carpet = game.Content.Load<Texture2D>(@”Carpet”);
terrainEffect.Parameters[“GroundText2”].SetValue(carpet);
// Now let’s set some new parameters that we will be using latter in our HLSL code:
terrainEffect.Parameters[“GroundText0Scale”].SetValue(terrainHardwoodDensity);
terrainEffect.Parameters[“GroundText1Scale”].SetValue(terrainTileDensity);
terrainEffect.Parameters[“GroundText2Scale”].SetValue(terrainCarpetDensity);
[/code]
The HLSL Side
Now we have the different terrain types loaded into the effect as parameters. With these new terrain textures and their respective “scale” parameters, we can now draw them repeating across the entire ground plane — to do this, we use the “AddressU = wrap” and “AddressV = wrap” parameters in the sampler code for these new textures (see lines 13-14, 25-26, 37-38). Here’s what our new samplers in the HLSL should look like:
[code lang=”c”]
float GroundText0Scale;
float GroundText1Scale;
float GroundText2Scale;
texture GroundText0;
sampler GroundText0Sampler = sampler_state
{
Texture = (GroundText0);
MinFilter = Linear;
MagFilter = Linear;
MipFilter = Linear;
AddressU = wrap;
AddressV = wrap;
};
texture GroundText1;
sampler GroundText1Sampler = sampler_state
{
Texture = (GroundText1);
MinFilter = Linear;
MagFilter = Linear;
MipFilter = Linear;
AddressU = wrap;
AddressV = wrap;
};
texture GroundText2;
sampler GroundText2Sampler = sampler_state
{
Texture = (GroundText2);
MinFilter = Linear;
MagFilter = Linear;
MipFilter = Linear;
AddressU = wrap;
AddressV = wrap;
};
[/code]
Next, we will put some logic in our pixel shader that will sample from only one of the three terrain textures, depending on what colour we receive from the “ground” texture:
[code lang=”c” highlight=””]
float4 PixelShader(VS_OUTPUT input) : COLOR
{
float4 colour = tex2D(GroundSampler, input.TexCoord);
if(colour.r == 1)
{
colour = tex2D(GroundText0Sampler, input.TexCoord * GroundText0Scale);
}
else if(colour.g == 1)
{
colour = tex2D(GroundText1Sampler, input.TexCoord * GroundText1Scale);
}
else
{
colour = tex2D(GroundText2Sampler, input.TexCoord * GroundText2Scale);
}
return colour;
}
[/code]
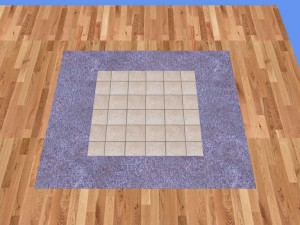
This will result in Toy Factory-style multitexturing that is super-fast, no matter what the size of your ground is. You can adjust the scaling of each type of terrain by using the “Scale” parameters that are passed into the effect.
Part 3: Organic terrain blending
Though these hard cut edges worked well for our indoor environment, many games will require a smoother blending between terrain types to create the illusion of an organic and natural terrain. To achieve this effect, simply change the ground sampler’s min, mag, and mip filters and change the logic of the pixel shader:
[code lang=”c”]
texture Ground;
sampler GroundSampler = sampler_state
{
Texture = (Ground);
MinFilter = Linear;
MagFilter = Linear;
MipFilter = Linear;
// use “clamp” to avoid unwanted wrapping problems at the edges due to smoothing:
AddressU = clamp;
AddressV = clamp;
};
[/code]
[code lang=”c”]
float4 PixelShader(VS_OUTPUT input) : COLOR
{
float4 groundSample = tex2D(GroundSampler, input.TexCoord);
float4 colour = float4(0,0,0,1);
colour += tex2D(GroundText0Sampler, input.TexCoord * GroundText0Scale) * groundSample.r;
colour += tex2D(GroundText1Sampler, input.TexCoord * GroundText1Scale) * groundSample.g;
colour += tex2D(GroundText2Sampler, input.TexCoord * GroundText2Scale) * groundSample.b;
return colour;
}
[/code]
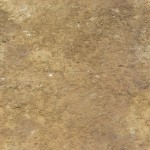
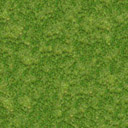
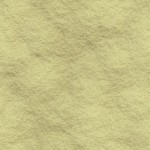
Let’s use these three textures instead:
This will result in the following, more organic looking terrain:
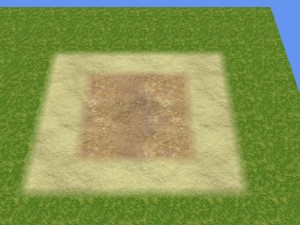
You can also modify the “ground” texture to include softer edges between values to have a smoother blending of terrain types.
Part 4: Mapping the terrain to complex geometry (deformable terrain)
When developing the fog of war for Toy Factory, I discovered a great trick that Catalin Zima used in his fog of war sample. In his sample he used world coordinates to determine the colour/alpha value for a given pixel in the pixel shader. This concept can also be applied in our sample by simply using the X and Y world coordinates to determine the texture coordinate that will be passed to the sampler.
The C# Side
Our C# code can change a bit now because we are no longer using texture coordinates. Instead, we will purely be using world coordinates. At this point you can change the vertex declaration to use VertexPositionColor, which is a little faster than the old VertexPositionTexture due to less data being sent to the graphics card. Or, you can scrap the old vertex buffer altogether and draw your own imported model, a custom mesh that has been optimized using a quadtree, or anything else you want!
Add the following to your initialize method:
[code lang=”csharp”]
terrainEffect.Parameters[“MapWidth”].SetValue(mapWidth);
terrainEffect.Parameters[“MapHeight”].SetValue(mapHeight);
[/code]
The following code will draw an existing model with the effect, but you could also use a heightmap-generated mesh as well.
[code lang=”csharp”]
foreach (ModelMesh mesh in terrainModel.Meshes)
{
foreach (Effect effect in mesh.Effects)
{
effect.CurrentTechnique = terrainEffect.Techniques[“Terrain”];
effect.Parameters[“View”].SetValue(camera.ViewMatrix);
effect.Parameters[“Projection”].SetValue(camera.ProjectionMatrix);
mesh.Draw();
}
}
[/code]
The HLSL Side:
Add the following two parameters:
[code lang=”c”]
float MapWidth;
float MapHeight;
[/code]
And change your vertex and pixel shaders and input/output structures:
[code lang=”c”]
// Vertex shader input structure.
struct VS_INPUT
{
float4 Position : POSITION0;
};
// Vertex shader output structure.
struct VS_OUTPUT
{
float4 Position : POSITION0;
float4 WorldPos : TEXCOORD0;
};
// Vertex shader program.
VS_OUTPUT VertexShader(VS_INPUT input)
{
VS_OUTPUT output;
//generate the view-projection matrix
float4x4 vp = mul(View, Projection);
output.Position = mul(input.Position, vp);
output.WorldPos = input.Position;
return output;
}
float4 PixelShader(VS_OUTPUT input) : COLOR
{
float2 mapPosition = float2(input.WorldPos.x / MapWidth, input.WorldPos.z / MapHeight);
float4 groundSample = tex2D(GroundSampler, mapPosition);
float4 colour = float4(0,0,0,1);
colour += tex2D(GroundText0Sampler, mapPosition * GroundText0Scale) * groundSample.r;
colour += tex2D(GroundText1Sampler, mapPosition * GroundText1Scale) * groundSample.g;
colour += tex2D(GroundText2Sampler, mapPosition * GroundText2Scale) * groundSample.b;
return colour;
}
[/code]
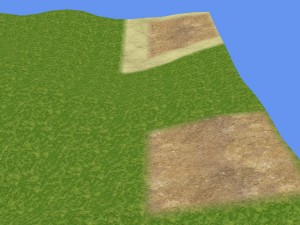
And here’s the result — It needs a bit of artistic work, but all the functionality that you need should be at your fingertips!
Comments
One response to “Simple, fast, GPU-driven multi-textured terrain”
[…] This post was mentioned on Twitter by Nick Gravelyn, Pieter Germishuys. Pieter Germishuys said: RT @nickgravelyn: Pretty cool post on doing multitexturing with #xna http://allenwp.com/blog/2010/05/06/simple-fast-gpu-driven-multi-textured-terrain/ […]